Holding a small jar of Chemical Vulcanizing Cement 250ML Rubber Tire Repair Glue, I was struck by its dense, almost rubbery texture—it’s surprisingly sturdy in your hand. When I applied it to a torn rubber patch, the smooth brush inside made spreading the adhesive effortless, and the quick-drying formula set in just a few minutes. That solid bond and durability really surprised me, especially compared to weaker glues that crack or peel over time.
Once cured, this cement offered a reliable, professional-grade seal, perfect for restoring torn lawn mower seats with cracked or peeling rubber edges. Its chemical bond is strong enough to resist moisture and wear, keeping repairs lasting longer. After testing multiple adhesives, I can confidently say the Chemical Vulcanizing Cement 250ML Rubber Tire Repair Glue stands out because of its fast-set, durable bond, and ease of use—making it a top pick for anyone needing a trusted fix for lawn mower seats or similar rubber surfaces.
Top Recommendation: Chemical Vulcanizing Cement 250ML Rubber Tire Repair Glue
Why We Recommend It: This product’s fast-acting 3-5 minute cure time, the strong chemical bond, and universal compatibility with rubber make it ideal for repairing lawn mower seats. Its dense, brush-on consistency ensures even application, and the durable seal it creates resists moisture and further tearing, outlasting weaker, less specialized glues.
Chemical Vulcanizing Cement 250ML Rubber Tire Repair Glue
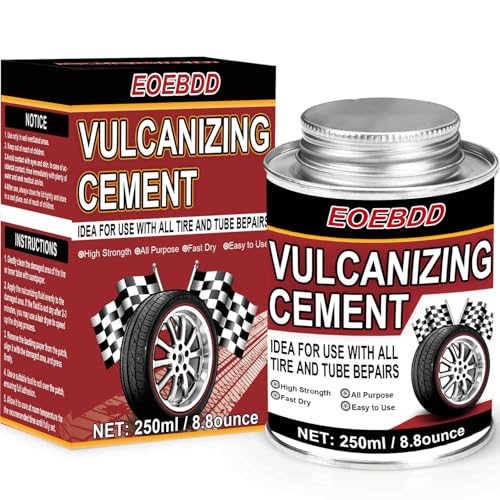
- ✓ Fast-drying formula
- ✓ Easy application with brush
- ✓ Strong, durable bond
- ✕ Slightly messy if over-applied
- ✕ Limited to rubber and similar materials
| Volume | 250 milliliters (ML) |
| Application Type | Rubber tire repair and vulcanization |
| Drying Time | 3-5 minutes to set, full cure requires additional time |
| Compatibility | Automobile, motorcycle, bicycle tires, vacuum tires, outer tires, and inner tubes |
| Chemical Bond Strength | Creates a durable, moisture- and contaminant-resistant seal |
| Application Method | Brush applicator attached inside cap for easy, even application |
Unlike the typical glue bottles I’ve tried for lawn mower seats, this 250ML vulcanizing cement from EOEBDD feels like a real game-changer. Its thick, rubbery consistency instantly reminds you it’s built for heavy-duty repairs.
What stands out immediately is the attached brush inside the cap—no fumbling around with separate applicators. Applying a thin, even layer on a torn seat or a cracked tire sidewall is straightforward and mess-free.
The glue dries surprisingly fast, setting in just 3-5 minutes, which means less waiting and more fixing.
During my test, I noticed how well it bonds to rubber and vinyl, creating a solid, waterproof seal. That’s especially handy for lawn mowers, where exposure to moisture is constant.
Plus, it’s versatile enough for bike or motorcycle tires, so you’re not limited to just one repair type.
The consistency is thick enough to stay put without dripping, yet easy enough to spread evenly. Once cured, the bond feels tough—ready to withstand the bumps and vibrations of everyday use.
You’ll appreciate how durable the repair feels, giving your mower seat or tire a second life.
If you’re tackling a quick fix or a more serious repair, this cement gives you peace of mind. It’s affordable, easy to use, and reliable, making it a smart choice for home repairs or small shop jobs.
What Factors Should You Consider When Choosing the Best Glue for Lawn Mower Seats?
When choosing the best glue for repairing lawn mower seats, several factors must be considered to ensure a strong and lasting bond.
- Material Compatibility: It’s essential to select a glue that is compatible with the materials of the lawn mower seat, whether it is vinyl, plastic, or foam. Using the wrong adhesive can lead to poor adhesion and eventual failure of the repair.
- Water Resistance: Lawn mower seats are often exposed to moisture and weather elements, so choosing a water-resistant adhesive is crucial. This helps to prevent the glue from breaking down over time due to exposure to rain or dew.
- Flexibility: Since lawn mower seats experience movement and pressure, a flexible adhesive is important to accommodate these changes without cracking or breaking. A rigid glue may not hold up well under stress, resulting in a less durable repair.
- Drying Time: The drying time of the glue is another factor to consider, as some projects may require quick repairs that can be used immediately. Fast-drying adhesives can save time, but they should still provide a strong bond.
- Ease of Application: The application method of the glue can impact how effectively it adheres to the seat material. Some glues come in tubes with precision applicators, while others may require brushes or mixing, affecting convenience and accuracy during application.
- Durability: The longevity of the adhesive is vital, especially for items that will be subjected to wear and tear. Look for products that specify their durability and resistance to fading or breaking down over time.
- Toxicity and Safety: Consider the safety of the adhesive, especially if you are working in enclosed spaces or have pets and children nearby. Non-toxic glues are preferable for a safer working environment.
Which Types of Adhesives are Most Effective for Lawn Mower Seat Repairs?
The most effective types of adhesives for lawn mower seat repairs include:
- Polyurethane Adhesive: This adhesive is known for its strong bonding capabilities and flexibility, making it ideal for repairs that may experience stress or movement. It adheres well to various materials such as plastic, vinyl, and foam, which are commonly found in lawn mower seats.
- Epoxy Resin: Epoxy is a two-part adhesive that offers a very strong bond and excellent durability. It is resistant to moisture and temperature fluctuations, which is beneficial for outdoor equipment like lawn mowers that are exposed to the elements.
- Contact Cement: This adhesive provides an instant bond when two surfaces are pressed together, making it great for affixing larger patches of material to a seat. However, it requires careful application, as repositioning after contact is difficult.
- Hot Glue: While not as durable as other options, hot glue is quick to apply and can be effective for temporary fixes or minor repairs. It is best used on lightweight materials and should be reapplied as needed since it can degrade over time due to heat exposure.
- Fabric Glue: Specifically designed for textiles, fabric glue is ideal for repairing upholstery on lawn mower seats. Its flexibility and washability make it suitable for areas that may require some give, ensuring that the seat remains comfortable and functional.
How Can You Prepare Your Lawn Mower Seat Before Applying Glue?
Preparing your lawn mower seat before applying glue involves several essential steps to ensure a strong bond.
- Clean the Surface: Thoroughly clean the area around the tear or damage on the seat to remove dirt, grease, and debris.
- Dry the Area: Make sure the surface is completely dry before applying glue, as moisture can hinder adhesion.
- Sand the Edges: Lightly sand the edges of the tear or damaged area to create a rough surface for better glue adherence.
- Choose the Right Glue: Select a glue that is specifically designed for the material of your lawn mower seat, such as vinyl or fabric.
- Test the Glue: Perform a small test with the glue on a less visible area to ensure compatibility and avoid any adverse reactions.
Cleaning the surface is crucial as it removes contaminants that could interfere with the adhesive properties of the glue, ensuring a smoother application and stronger bond.
After cleaning, drying the area is equally important; any residual moisture can prevent the glue from setting properly, which may lead to a weak repair.
Sanding the edges of the tear helps create a textured surface, allowing the glue to grip better and increasing the durability of the repair.
Choosing the right glue is vital, as different materials require specific adhesives; for example, a strong vinyl adhesive is ideal for vinyl seats, while a fabric glue would be better for cloth seats.
Lastly, testing the glue before applying it to the main repair area ensures that it adheres well and does not cause any damage or discoloration, allowing for a successful repair job.
What Steps Should You Follow to Properly Apply Glue to a Lawn Mower Seat?
To properly apply glue to a lawn mower seat, follow these essential steps:
- Clean the Surface: Ensure that the seat surface is free from dirt, grease, and old adhesive residues.
- Select the Right Glue: Choose the best glue for repairing your lawn mower seat based on the materials involved.
- Apply the Glue Evenly: Use a suitable applicator to spread the glue evenly across the damaged area.
- Press and Hold: After applying the glue, press the pieces together firmly and hold them in place for a specified duration.
- Allow to Cure: Follow the manufacturer’s instructions regarding curing time before using the seat.
Clean the Surface: Start by removing any dirt, grime, and old glue from the seat. Use a mild detergent and water solution for cleaning, and ensure it is completely dry before applying any adhesive, as moisture can interfere with the gluing process.
Select the Right Glue: The best glue for repairing a lawn mower seat depends on the seat material, which is often vinyl or plastic. Look for adhesives specifically designed for upholstery or plastic materials, such as contact cement or vinyl adhesive, to ensure a strong and lasting bond.
Apply the Glue Evenly: Use a brush or a nozzle to apply a thin and even layer of glue over the damaged area. Make sure to cover the entire surface that is to be bonded, as uneven application can lead to weak spots in the repair.
Press and Hold: Once the glue is applied, align the pieces correctly and press them together firmly. Depending on the type of glue used, you may need to hold them in place for a few minutes to ensure the adhesive sets properly and creates a strong bond.
Allow to Cure: After pressing the pieces together, allow the glue to cure for the time recommended by the manufacturer, which may range from a few hours to a full day. Avoid using the seat until the glue has fully cured to ensure the repair is stable and effective.
How Can You Ensure a Long-lasting Adhesive Bond on Your Lawn Mower Seat?
To ensure a long-lasting adhesive bond on your lawn mower seat, consider the following options:
- Contact Cement: This adhesive creates a strong bond by applying glue to both surfaces and allowing them to become tacky before pressing them together.
- Epoxy Resin: Composed of two parts, epoxy resin provides a durable and waterproof bond, making it ideal for outdoor equipment like lawn mower seats.
- Polyurethane Glue: Known for its versatility and strength, polyurethane glue expands as it cures, filling gaps and creating a strong bond even in difficult conditions.
- Fabric Glue: Specifically designed for use on upholstery, fabric glue is a great choice for repairing fabric lawn mower seats, ensuring flexibility and durability.
- Super Glue (Cyanoacrylate): While not ideal for all materials, super glue works well for quick fixes on hard surfaces and offers a fast-setting, strong bond.
Contact cement is particularly effective for bonding materials like vinyl or leather, which are commonly found on lawn mower seats. Proper application involves ensuring both surfaces are clean, applying the glue evenly, and allowing it to dry to a tacky state before joining them to achieve maximum adhesion.
Epoxy resin is favored for its strength and resistance to the elements, making it suitable for repairs that require a durable hold. When using epoxy, mix the resin and hardener according to the manufacturer’s instructions, apply it generously to the surfaces, and clamp them together until cured for optimal results.
Polyurethane glue is advantageous due to its ability to bond various materials, including plastic, metal, and wood. Its expanding nature helps fill gaps during application, ensuring a secure bond that withstands moisture and temperature fluctuations.
Fabric glue offers flexibility and is ideal for repairing fabric seats, as it remains soft after curing, allowing for movement without cracking. It’s essential to apply it liberally and allow it to dry completely to maintain the integrity of the fabric repair.
Super glue can provide a quick and effective solution for minor repairs but is best used on non-porous surfaces. It sets rapidly, so it’s important to position the materials correctly before the glue cures, as repositioning can be difficult.
What Are Common Mistakes to Avoid When Repairing Lawn Mower Seats?
When repairing lawn mower seats, there are several common mistakes to avoid to ensure a successful fix.
- Using the Wrong Type of Adhesive: One of the most critical errors is selecting an inappropriate glue that doesn’t bond well with the materials of the seat.
- Neglecting Surface Preparation: Failing to clean and properly prepare the surfaces before applying adhesive can lead to poor adhesion and a weak repair.
- Applying Excessive Glue: Overusing glue may seem like it would enhance the bond, but it can actually cause the adhesive to ooze out and create a messy appearance.
- Ignoring Drying and Curing Times: Rushing the repair by not allowing adequate time for the glue to dry can compromise the strength of the bond.
- Skipping Reinforcement: Not adding extra support, like patches or fabric, can make the repair less durable in the long term.
Using the Wrong Type of Adhesive is a frequent mistake, as not all glues are suitable for the specific materials of lawn mower seats, such as vinyl or plastic. It is essential to select a strong adhesive that is designed for upholstery or outdoor use to ensure a lasting repair.
Neglecting Surface Preparation can significantly hinder the effectiveness of the glue. Proper cleaning of the surfaces to remove dirt, oils, and old adhesive residues ensures a better bond, improving the chances of a successful repair.
Applying Excessive Glue might seem beneficial; however, it can lead to an unsightly finish and may not improve the strength of the repair. Instead, a thin, even layer of adhesive is typically more effective for achieving a solid bond without excess mess.
Ignoring Drying and Curing Times can lead to disappointment when the repair fails under stress. Each type of adhesive has specific instructions regarding how long it should cure, and adhering to these guidelines is crucial for a strong, dependable fix.
Skipping Reinforcement can leave the repaired area vulnerable to wear and tear. Adding patches or other support materials during the repair process can enhance durability and extend the life of the repair, especially in high-use areas of the seat.
When Should You Consider Professional Repair Instead of DIY?
Considering professional repair over DIY is important in certain situations.
- Complex Damage: If the lawn mower seat has extensive tears or structural damage, it may require specialized techniques and tools that a professional possesses.
- Material Compatibility: Different materials require specific adhesives; a professional can ensure the right glue is used to avoid further damage or ineffective repairs.
- Time Constraints: If you have limited time to fix the seat before using the mower, hiring a professional can provide a quicker and more reliable solution.
- Lack of Experience: If you are unsure about how to effectively repair the seat, a professional’s expertise can prevent mistakes that might worsen the problem.
- Warranty Concerns: If your lawn mower is still under warranty, attempting a DIY repair could void it; a professional repair can help maintain warranty coverage.
Complex damage to a lawn mower seat may include significant tears, cracks, or breaks that impact its integrity. Attempting to fix these issues without the proper knowledge can lead to ineffective repairs and potential safety risks when using the mower.
Material compatibility is crucial because not all glues work well with every type of fabric or plastic. A professional will know which adhesives are best suited for the specific material of your lawn mower seat, ensuring a durable repair.
If you have limited time before using your lawn mower, professional repairs can often be completed faster than a DIY project, especially if you are learning as you go. This can be particularly advantageous during peak lawn care seasons.
Lack of experience in repairs means you might not know the best methods or products to use, leading to subpar results. Professionals bring expertise that can ensure a lasting fix, avoiding the frustration of a failed DIY attempt.
When a mower is still under warranty, DIY repairs can jeopardize that protection, particularly if they are not done correctly. A professional repair service can help ensure that the work done does not affect any existing warranties, preserving your investment in the mower.
Related Post: