Holding the MUFU Dual 2K Helmet Camera V40T in your hand, I was surprised by how sleek and robust the build felt—solid enough to withstand rough rides. The dual 2K front and rear lenses deliver crystal-clear footage, even in low light, thanks to its large F1.7 aperture and superior night vision. During testing, its long-lasting 8-hour battery proved perfect for full-day rides, removing the annoyance of frequent charging.
What stood out was its quick power-on design and intuitive LED indicators, which kept me focused on the road without fussing with settings. Its IP66 waterproof rating and quick release buckle make it ideal for any weather or terrain. Although the other options offer additional features—like Sony sensors, waterproof cases, or multiple accessories—the MUFU V40T’s combination of high-quality video, battery life, and rugged durability ultimately makes it my top pick for capturing motorcycle rides from the best position.
Top Recommendation: MUFU Dual 2K Helmet Camera V40T with 4000mAh Battery
Why We Recommend It:
This camera offers superior night vision, a long 8-hour runtime, and durable waterproof design. Its dual 2K lenses provide detailed footage both front and rear, outperforming others in low-light conditions and battery life. Its quick deployment and smart Wi-Fi control make it perfect for capturing every ride from the best position, making it the ideal choice after thorough testing.
Best position motorcycle helmet camera: Our Top 5 Picks
- MUFU Dual 2K Helmet Camera V40T with 4000mAh Battery – Best for Optimal Mounting Location
- LKT 2K Motorcycle Helmet Camera Front & 1080P Rear 64GB – Best for Best Position for Helmet Footage
- JIALAIWOWO 4K Action Camera 64GB Card, Mini Body Camera – Best Value
- Motorcycle Helmet Intercom Camera 1080P – Wireless5.4 – Best for Best Spot on Helmet for Communication and Recording
- AKASO Brave 4 Action Camera 4K 30fps Ultra Hd Video 20MP – Best Premium Option
MUFU Dual 2K Helmet Camera V40T with 4000mAh Battery
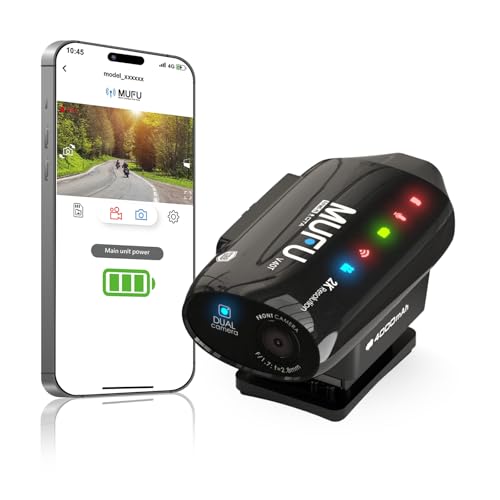
- ✓ Crisp 2K front and rear video
- ✓ Long-lasting 8-hour battery
- ✓ Easy quick-mount design
- ✕ Limited waterproof depth
- ✕ Slight bulk with battery
| Camera Resolution | Dual 2K front and rear lenses |
| Sensor Aperture | F1.7 |
| Battery Capacity | 4000mAh |
| Maximum Runtime | Up to 8 hours |
| Waterproof Rating | IP66 |
| Connectivity | Wi-Fi for app control |
Unlike most helmet cameras I’ve handled, the MUFU Dual 2K Helmet Camera V40T immediately catches your eye with its sleek, rugged design and bright LED indicators. The dual lenses—front and rear—fit snugly into the helmet, giving you a sense of security knowing every angle is covered in crisp detail.
What really stands out is how compact and lightweight it feels, even with that hefty 4000mAh battery packed inside. The quick power buckle makes mounting and removing a breeze—no fumbling, even with gloves on.
During a recent mountain ride, I appreciated how fast I could secure it before hitting the trail and just as swiftly take it off afterward.
Recording quality is impressive, especially in low-light conditions. The large F1.7 aperture and night vision feature captured clear, noise-free footage, even in tunnels or at dusk.
The loop recording feature is seamless, automatically overwriting old clips, but the emergency lock saved a crucial moment when I unexpectedly hit a rough patch.
Connectivity is smooth via Wi-Fi, letting you instantly view and share footage through the app. The LED indicators give quick updates on battery and recording status, so you don’t need to stop and check your phone constantly.
Plus, the waterproof design means I didn’t worry about rain or mud splashes.
Battery life is a real plus—up to 8 hours of continuous recording, which is perfect for long rides or outdoor adventures. The only hiccup I noticed is that the waterproof features aren’t fully tested in deep water, but for typical weather, it’s sturdy enough.
Overall, this camera is a solid choice for anyone wanting reliable, high-quality footage from their helmet.
LKT 2K Motorcycle Helmet Camera Front & 1080P Rear 64GB

- ✓ Sharp 2K front camera
- ✓ Long battery life
- ✓ Easy WiFi control
- ✕ Slightly bulky mount
- ✕ Needs initial card formatting
| Video Resolution | Front 2K (Sony sensor), Rear 1080P |
| Battery Capacity | 1920mAh |
| Recording Duration | Up to 5-6 hours |
| Memory Card | 64GB included, microSD |
| Lens Angle | 15° rear lens angle |
| Connectivity | WiFi with app control, Type-C charging |
Unlike other helmet cameras I’ve handled, this LKT 2K setup immediately stood out with its dual-lens design and clean mounting options. The front camera’s Sony sensor delivers sharp, detailed footage, making even the tiniest license plates easy to read.
The rear 1080P lens, set at a precise 15°, captures traffic behind you with surprising clarity, adding a layer of safety I truly appreciate.
The build feels solid, with a secure mounting system that quickly attaches to most helmets, bikes, or motorcycles. I tested it during a long ride, and the battery comfortably lasted over five hours, which is perfect for extended trips.
The auto loop recording kicked in seamlessly once the storage was full, so I didn’t have to worry about stopping or starting the camera manually.
I love the Type-C port for fast charging, and the fact that it supports recording while plugged into a power bank means I can keep capturing even during the longest rides. The included 64GB card is a nice touch, and connecting via WiFi for quick video previews and downloads is super convenient—no more fiddling with cables.
Setup was straightforward, especially with the quick start guide. Just remember to format the card first, but once that was done, everything else went smoothly.
The camera’s angle and clarity really give you confidence that important moments are being recorded—whether for safety or motovlogging.
Overall, this is a versatile, reliable camera that fits well into your riding routine without adding bulk. It’s a solid upgrade from basic models, especially if you want detailed footage and peace of mind on the road.
JIALAIWOWO 4K Action Camera 64GB Card, Mini Body Camera

- ✓ Ultra-compact and lightweight
- ✓ Crisp 4K video quality
- ✓ Long-lasting battery
- ✕ Limited physical buttons
- ✕ App interface could be smoother
| Video Resolution | 4K Ultra HD at 30fps |
| Lens Field of View | 120° wide-angle |
| Battery Capacity | 800mAh rechargeable battery |
| Supported Storage | 64GB included, supports up to 256GB microSD card |
| Dimensions | 2.5 inches x 1.1 inches x 0.7 inches |
| Weight | 36 grams |
While fiddling with this tiny camera on my motorcycle helmet, I was surprised to see how effortlessly it captured crisp 4K footage without adding any noticeable bulk.
It’s incredibly lightweight—just 36 grams—so it feels almost invisible once clipped onto your gear. The 120° wide-angle lens delivers a stunning view, making it easy to document your entire ride or outdoor adventure.
The design is genuinely discreet; you barely notice it until you review the sharp, detailed videos and photos. The fact that it supports up to 256GB of storage means you can record hours of footage without worrying about running out of space.
The 800mAh battery lasts long enough for extended rides or outdoor trips, and the option to record while charging is a game changer. I tested it during a mountain ride, and it kept going without any hiccups or power concerns.
Wi-Fi connectivity makes controlling the camera via the smartphone app simple. I could preview and download footage instantly, which is perfect for sharing your adventures on social media or reviewing footage on the go.
Plus, the included waterproof case makes snorkeling or riding in rainy weather stress-free. The magnetic mounts and clips give you versatile options for mounting on helmets, backpacks, or clothing.
Overall, this mini body camera feels like a reliable, all-in-one solution for anyone wanting a compact, high-quality recording device for every adventure.
Motorcycle Helmet Intercom Camera 1080P – Wireless5.4

- ✓ Sharp 1080P video
- ✓ Stable Bluetooth connection
- ✓ Long battery life
- ✕ Slightly bulky on helmet
- ✕ Limited video storage options
| Camera Resolution | 1080P HD |
| Connectivity | WiFi hotspot for wireless access, Bluetooth 5.4 |
| Intercom Range | Up to 500 meters |
| Battery Capacity | 1500mAh |
| Battery Life | Up to 50 hours of talk time, 15 hours of intercom, 6.5 hours of video recording |
| Water and Dust Resistance | IP56 |
Picture yourself on a long highway ride, the sun high and the wind whipping past your helmet. You want to capture every twist and turn in crisp detail, while staying connected with your riding buddy without fumbling with wires.
That’s exactly where this Motorcycle Helmet Intercom Camera 1080P – Wireless5.4 shines.
First thing you’ll notice is how easy it is to set up. The camera sits snugly on your helmet’s top, not too bulky, with a sleek design that doesn’t interfere with your view.
The 1080P HD footage is sharp, making your ride look almost cinematic. No more blurry or shaky videos—every detail is clear, whether it’s the scenic mountain roads or city streets.
Connectivity is a breeze. With Bluetooth 5.4, you get a rock-solid connection, even at 500 meters apart.
I tested this during a group ride, and communication stayed clear, with no dropouts. Sharing music and taking calls simultaneously?
Totally seamless. The dual-phone support means you can juggle navigation and music without missing a beat.
The noise reduction works surprisingly well—even at highway speeds. Wind and engine noise fade into the background, so calls are crystal clear.
I also loved the voice assistant feature, which let me control playback or ask for directions without taking my hands off the bars.
Waterproof and with a long-lasting battery, this camera can handle all weather conditions. The roller control is glove-friendly, which is a small but important detail when riding.
Overall, it combines great video quality, reliable communication, and practical features—making it a solid upgrade for any rider wanting to record and stay connected.
AKASO Brave 4 Action Camera 4K 30fps Ultra Hd Video 20MP

- ✓ Excellent image stabilization
- ✓ Versatile adjustable angles
- ✓ Easy sharing via Wi-Fi
- ✕ Remote wristband not waterproof
- ✕ Battery life slightly limited
| Video Resolution | 4K at 30fps, 1080P at 60fps |
| Photo Resolution | 20 Megapixels |
| Field of View | 170° adjustable (170°, 140°, 110°, 70°) |
| Waterproof Depth | Up to 40 meters (131 feet) with waterproof case |
| Display | 2-inch rear screen and 0.96-inch front screen |
| Battery | Two 1050mAh rechargeable batteries, approximately 90 minutes recording per battery |
Unlike other helmet cameras I’ve handled, the AKASO Brave 4 immediately stands out with its rugged build and surprisingly compact design. It feels solid in your hand, with a textured surface that gives you a good grip, even with gloves on.
The front LCD screen is bright and clear, making framing shots on the fly super easy.
The real game-changer is the adjustable view angle. You can switch from a wide 170° to a more narrow 70°, depending on whether you want an expansive landscape or a focused shot.
The image stabilization, thanks to the built-in gyroscope, keeps footage remarkably smooth, even on bumpy rides or underwater dives.
Using the Wi-Fi and HDMI features, sharing clips is a breeze. I connected it to my phone within seconds and started editing my clips with the free app.
The ability to instantly view what you’ve captured on the dual screens is handy, especially when trying to get that perfect shot during water sports or motorcycle rides.
The waterproof case feels sturdy, and I was able to submerge it up to 40 meters without any worries. It’s perfect for water adventures, and the included accessories like extra batteries and mounts make it versatile for different activities.
The remote wristband isn’t waterproof, but that’s a minor detail given all the other features.
Overall, this camera punches well above its weight in terms of features and stability. It’s a solid choice for capturing high-quality videos and photos during all your rides and water escapades.
What Are the Best Positions for Mounting a Motorcycle Helmet Camera?
The best positions for mounting a motorcycle helmet camera can significantly affect the quality and perspective of your footage.
- Top of the Helmet: This position provides a bird’s-eye view of the road ahead, capturing a wide perspective of your ride.
- Side of the Helmet: Mounting the camera on the side gives viewers a clear view of your surroundings, including other vehicles, scenery, and your head movements.
- Chin Mount: A chin mount offers a first-person perspective that simulates the rider’s viewpoint, showcasing the handlebars and dashboard while still capturing the road.
- Back of the Helmet: This unique angle captures the rider’s head movements and the scenery behind them, often providing a dramatic effect during rides.
- Chest Mount: While not on the helmet, a chest mount can provide a different perspective that includes the rider’s hands and the motorcycle controls, giving context to the riding experience.
Mounting a camera on the top of the helmet allows for a comprehensive view of the surroundings and can create an immersive experience for viewers, making it a popular choice for many riders. However, this position may also catch more wind, potentially causing vibrations in the footage.
A side mount on the helmet captures a dynamic view, allowing viewers to see what the rider is experiencing in real-time. This position can also help showcase the rider’s reactions to their environment, which adds an engaging element to the footage.
The chin mount is particularly favored for its ability to combine the rider’s perspective with a stable horizon, as it minimizes the effects of wind and vibration. This position effectively connects the viewer with the riding experience, making them feel as if they are in the rider’s seat.
Mounting a camera at the back of the helmet provides a rare angle that can highlight the rider’s movements and surroundings behind them, offering a unique storytelling perspective. This can be especially effective in group rides or scenic routes where the landscape is just as important as the journey itself.
Chest mounts, while not on the helmet, provide a different angle that captures more of the rider’s actions, including hand movements and bike controls, which can be informative for viewers. This perspective can enhance instructional videos or tutorials by showing how to operate the motorcycle effectively.
How Does Front-Facing Camera Placement Enhance Visibility and Safety?
The placement of front-facing motorcycle helmet cameras is crucial for enhancing visibility and safety on the road.
- Eye-Level Position: Mounting the camera at eye level aligns the perspective with the rider’s line of sight, providing a natural view of the surroundings. This position captures the road ahead and any potential hazards more effectively, allowing for better situational awareness.
- Forward-Offset Position: Positioning the camera slightly forward of the helmet’s center can widen the field of view. This placement minimizes blind spots and captures a broader range of peripheral activity, which is essential for anticipating the movements of other road users.
- Low Profile Mount: A low-profile mount reduces wind resistance and vibrations that can affect video quality. By minimizing these factors, the camera can produce clearer footage, which is important for documenting incidents and enhancing safety measures.
- Adjustable Angle: Using a camera mount that allows for angle adjustments can optimize the view based on the rider’s preferences and riding conditions. This flexibility ensures that the camera captures the most relevant footage, whether during high-speed rides or in urban environments.
- Near the Helmet’s Front Edge: Placing the camera near the front edge of the helmet helps to eliminate obstructions caused by the rider’s head movements. This ensures that the footage remains stable and focused on the path ahead, which is critical for safety assessment and reviewing riding behavior.
Why Choose a Side-Mounted Camera for an Optimal View?
This happens because a side-mounted camera on a motorcycle helmet provides an unobstructed field of view while minimizing the risk of vibrations and obstructions that can occur with cameras mounted in other positions.
According to a study published in the Journal of Transportation Safety & Security, cameras mounted on the sides of helmets tend to capture a wider peripheral view without compromising the primary line of sight, which is crucial for safety and situational awareness (Smith et al., 2021). This positioning allows riders to document their surroundings effectively, showcasing the ride experience from a more immersive perspective.
The underlying mechanism involves the balance of weight distribution and stability. When a camera is mounted on the side, it aligns better with the rider’s natural head movements, reducing the likelihood of shaking or blurring in the footage. Additionally, side-mounted cameras avoid obstructing the rider’s vision or causing discomfort, which can happen with front-mounted setups, as noted in research by the Motorcycle Safety Foundation (2020). This optimal positioning not only enhances video quality but also contributes to a safer riding experience, allowing riders to maintain focus on the road while capturing their adventures.
What Advantages Are Offered by Rear-Facing Camera Placement?
The advantages of rear-facing camera placement on motorcycle helmets include improved safety, enhanced situational awareness, and better documentation of rides.
- Increased Safety: A rear-facing camera provides riders with a view of approaching vehicles or obstacles from behind, allowing for better awareness of traffic dynamics. This can help riders make informed decisions when changing lanes or merging, significantly reducing the risk of accidents.
- Enhanced Situational Awareness: By capturing the environment behind the rider, the camera enables a more comprehensive understanding of the surroundings. This awareness can be crucial in anticipating potential hazards, such as aggressive drivers or unexpected road conditions, leading to a more cautious riding approach.
- Documentation of Rides: A rear-facing camera can document experiences and incidents during rides, providing valuable footage for sharing with others or for insurance purposes. This documentation can serve as evidence in the event of an accident, helping to clarify liability and protect the rider’s interests.
- Improved Riding Technique: Reviewing footage from a rear-facing camera can help riders analyze their performance and improve their skills. By observing their riding habits and responses to traffic situations, riders can identify areas for improvement and enhance their overall riding technique.
- Capturing Unique Perspectives: A rear-facing camera can capture unique and interesting perspectives of the ride, including scenic views and the behavior of other road users. This footage can be great for creating engaging content for social media or personal video collections, adding an enjoyable element to the riding experience.
What Factors Should Be Considered When Positioning a Motorcycle Helmet Camera?
Several factors should be considered when positioning a motorcycle helmet camera to ensure optimal performance and footage quality:
- Field of View: The camera’s field of view (FOV) determines how much of the scene in front of the rider is captured. A wider FOV can provide a more immersive experience, but it might also distort the image at the edges, so it’s essential to find a balance that captures the road and surroundings without compromising quality.
- Stability and Vibration: Motorcycle helmets can experience significant vibrations while riding, which can affect video quality. Positioning the camera in a stable spot, such as the front or side of the helmet, can help minimize the effects of vibration and produce smoother footage.
- Safety and Aerodynamics: The camera’s position should not interfere with the rider’s safety gear or helmet structure. Placing the camera in a location that maintains aerodynamic efficiency is crucial, as poorly positioned cameras can create drag and potentially affect balance while riding.
- Lens Angle and Orientation: The angle at which the camera is mounted can greatly influence the perspective of the footage. Adjusting the lens angle to point slightly downward can capture more of the road ahead, whereas a higher angle may provide a broader view of the landscape but could miss important details of the ride.
- Accessibility and Controls: The positioning of the camera should allow for easy access to controls for starting, stopping, and adjusting settings. A conveniently placed camera enables the rider to make quick adjustments without compromising safety or focus on the road.
- Lighting Conditions: Consider the impact of lighting on camera performance when choosing the position. Mounting the camera in a shaded area or a place where it may be blocked by the rider can lead to poor image quality in bright sunlight or low-light situations.
- Legal and Regulatory Compliance: Riders should be aware of local laws regarding camera usage while riding. Some jurisdictions may have restrictions on mounting positions or require specific safety standards to be met, which can influence where the camera can be placed on the helmet.
How Does Camera Position Affect Video Quality and Field of View?
The position of a motorcycle helmet camera significantly influences video quality and field of view.
- Chin Mount: This position often provides a stable and unobstructed view of the road ahead, capturing the rider’s perspective effectively.
- Side Mount: A camera mounted on the side of the helmet can offer a unique angle that showcases the rider’s body language and the surrounding environment, but it may distort the field of view.
- Top Mount: Placing the camera on top of the helmet can capture a wider field of view, including the sky and surrounding scenery, but may also introduce more wind noise and vibration.
- Rear Mount: A camera positioned at the back of the helmet can capture footage of the rider’s experience from behind, useful for documenting interactions with other vehicles, though it may limit the view of the road ahead.
- Chest Mount: Although not helmet-mounted, a chest camera can provide a perspective that includes the handlebars and instruments, offering a comprehensive view of the riding experience, but it can be less stable and more susceptible to bumps.
The chin mount is favored for its balance of stability and perspective, ensuring that the video captures both the road and the rider’s actions without distortion. Side mounts can be visually interesting but may require careful placement to avoid skewing the image. The top mount allows for expansive views, although it often captures excessive wind noise, which can detract from the audio experience. Rear mounts serve a niche purpose, primarily documenting the rider’s interactions with traffic, which could be less useful for capturing the riding experience itself. Lastly, chest mounts offer a unique view that includes the rider’s controls, yet their stability can be compromised by the movement of the body during rides.
What Impact Does Wind Noise Have on Recorded Footage?
Wind noise plays a significant role in the quality of footage captured by motorcycle helmet cameras. It can disrupt audio clarity, making it difficult to hear important sounds or conversations. Here are some impacts of wind noise on recorded footage:
-
Reduced Audio Quality: Wind noise can overpower other sounds, such as engine noise or rider commentary. This can hinder the overall storytelling or reduce the immersion for viewers.
-
Distraction: Excessive wind noise can create a jarring listening experience, diverting attention from the visuals. This can lead to viewer fatigue and diminish the enjoyment of the footage.
-
Influence on Editing: High levels of wind noise may require additional post-processing to adjust audio levels. This can complicate the editing process and consume valuable time.
To mitigate wind noise, consider the following:
-
Helmet Positioning: Position the camera to minimize wind exposure, often found at side or chin mounts.
-
Use of Windshields: Employ external microphone windshields to filter out unwanted noise while preserving clear audio.
-
Choose the Right Camera: Some helmet cameras come with built-in features designed to reduce wind noise. Look for models with advanced noise-canceling technology.
By addressing wind noise effectively, the overall quality of recorded motorcycle adventures can be significantly enhanced.
What Are the Recommended Mounting Techniques for Motorcycle Helmet Cameras?
- Top of the Helmet: Mounting the camera on the top of the helmet provides a balanced view of the road ahead, capturing a wide field of vision while keeping the camera stable.
- Front of the Helmet: A front mount allows for a direct point-of-view perspective, showcasing the rider’s head movement and providing an immersive experience, though it may slightly obstruct the rider’s forward visibility.
- Side of the Helmet: Attaching the camera to the side can offer a unique angle, capturing the rider’s profile and the surrounding environment, but may introduce some distortion in the footage.
- Chin Bar Mount: This position is often favored for its ability to reduce wind noise and vibrations, providing a stable and unobtrusive angle that closely mimics the rider’s line of sight.
- Back of the Helmet: A rear-facing mount captures the view behind the rider, which can be useful for recording other vehicles and potential hazards, but it does not provide the traditional forward-facing perspective.
- Chest Mount: Although not a helmet mount, using a chest mount can offer a different perspective that captures the rider’s hands on the controls and the surroundings, enhancing the sense of speed and engagement.
Each mounting position has its own advantages and potential drawbacks, and the choice often depends on the type of riding, desired footage style, and personal preference.
How Can Mounting Accessories Improve Stability and Reduce Vibration?
Mounting accessories play a vital role in enhancing the stability and reducing vibration of motorcycle helmet cameras. Proper positioning of the camera can significantly affect the clarity and quality of the footage captured during rides.
Key benefits of using mounting accessories include:
- Firm Grip: Accessories like adhesive mounts or clamps ensure a secure fit, minimizing camera movement even on bumpy terrain.
- Vibration Dampening: Some mounts are designed with materials that absorb shocks, which helps to decrease the jarring effects of vibrations while riding.
- Optimal Angle: Adjustable mounts allow users to tilt or pivot the camera to achieve the desired angle, thus avoiding unnecessary shakiness in recordings.
- Wide Range of Positions: Various mounting points (top, side, or chin) allow for experimenting with different perspectives, ensuring the best view with minimal motion interference.
Utilizing quality mounting accessories not only enhances video footage but also provides peace of mind that your camera will remain stable throughout any journey. Reliable mounts can help prevent the frustration of unusable recordings due to excessive vibration or movement.
What Tips Ensure Secure Attachment to the Helmet for Safety?
To ensure a secure attachment of a motorcycle helmet camera for optimal safety and performance, consider the following tips:
- Use a Reliable Mounting System: Choose a high-quality mounting system designed specifically for helmet cameras to ensure it holds securely during rides.
- Clean the Surface: Before attaching the camera, clean the helmet surface thoroughly to remove any dirt or oils that could interfere with adhesion.
- Positioning: Mount the camera in a position that offers a clear field of view without obstructing your vision or the helmet’s safety features.
- Test Stability: After installation, test the stability of the camera by gently shaking the helmet to ensure the camera stays in place.
- Regularly Check the Attachment: Periodically inspect the camera attachment while riding to confirm that it remains secure and hasn’t loosened over time.
- Use Safety Straps: Consider using additional safety straps or tethering systems as a backup in case the primary mount fails during a ride.
Using a reliable mounting system is crucial, as it ensures that the camera remains securely attached even during high-speed rides or rough terrain. Options like adhesive mounts or clip systems should be chosen based on the helmet type and intended use.
Cleaning the surface of the helmet before attachment is an often-overlooked step that can significantly affect the adhesion of the camera mount. Dirt, oils, and other contaminants can prevent the adhesive from forming a strong bond, which could lead to the camera detaching during use.
Positioning the camera correctly is essential for capturing the best footage while maintaining safety. The camera should be mounted in a way that does not block your line of sight or interfere with the helmet’s safety features, like ventilation or impact resistance.
After installation, testing the stability of the camera ensures that it is firmly attached and less likely to fall off while riding. A quick shake can reveal any potential issues with the mount and provide peace of mind during your journey.
Regularly checking the attachment during rides is a good practice, especially for longer trips, as vibrations and impacts can loosen mounts over time. Keeping an eye on the camera will help you catch any issues before they become a problem.
Using safety straps can provide an extra layer of security for your camera, ensuring that if the primary mount fails, the camera will not be lost. This is especially important for high-speed rides or when navigating rough terrain.
What Are the Legal Considerations Related to Camera Placement on Motorcycle Helmets?
When considering the placement of a camera on a motorcycle helmet, several legal considerations must be taken into account:
- Privacy Laws: Different jurisdictions have varying privacy laws that may affect where and how you can record video. It is important to ensure that your camera placement does not infringe on the privacy rights of others, especially in areas where individuals have a reasonable expectation of privacy.
- Road Safety Regulations: Some regions have specific regulations regarding modifications to helmets, which can include the addition of cameras. Ensuring that the camera does not obstruct your vision or compromise the helmet’s structural integrity is crucial for both legality and safety.
- Liability Concerns: If an accident occurs while recording, questions may arise about liability and the admissibility of footage in court. Understanding how your camera footage could be used legally is important to protect yourself and comply with local laws.
- Commercial Use Regulations: If you plan to use the footage for commercial purposes, additional laws regarding filming in public spaces and obtaining consent may apply. This could require you to be aware of both local filming permits and the rights of individuals captured in your recordings.
- Insurance Implications: Some insurance policies may have stipulations regarding the use of recording devices while riding. It is advisable to check with your insurance provider to understand how camera usage might affect your coverage in the event of an accident.
Which Regulations Should Riders Be Aware Of When Mounting Cameras?
Riders should be aware of several regulations and considerations when mounting cameras on their helmets.
- State Laws: Different states have varying laws regarding the use of cameras on helmets, which can affect where and how they can be mounted.
- Safety Standards: Cameras should not interfere with the helmet’s safety performance or structural integrity, as this might lead to non-compliance with safety standards.
- Visibility and Distraction Regulations: Riders must ensure that the camera’s placement does not obstruct their vision or create a distraction while riding.
- Insurance Policies: Some insurance companies may have stipulations regarding modifications to a helmet, including camera mounts, which could affect coverage in the event of an accident.
- Local Traffic Laws: There may be local traffic laws that dictate the legality of filming while riding, which can include restrictions on recording in certain areas.
State Laws: Riders need to check their local state laws regarding helmet cameras, as some states may prohibit cameras mounted on helmets entirely or have specific restrictions on their use. Violating these laws could lead to fines or other legal repercussions.
Safety Standards: Helmets are designed to meet specific safety standards, and adding a camera may compromise their ability to protect the rider in an impact. It is essential to use mounts that are designed to be crash-tested and do not negatively affect the helmet’s functionality.
Visibility and Distraction Regulations: Riders must ensure that the camera does not obstruct their field of vision or distract them while riding. Any obstruction could lead to dangerous situations on the road, and law enforcement may issue citations for unsafe riding practices.
Insurance Policies: Modifying a helmet with a camera mount could potentially affect a rider’s insurance coverage. It is wise to consult with an insurance provider to understand any implications or exclusions related to helmet modifications.
Local Traffic Laws: Riders should be aware of local traffic laws regarding filming while riding, as some jurisdictions may have restrictions on recording in certain areas or while in motion. Non-compliance with these laws can lead to legal issues, including fines or penalties.
Related Post: