The landscape for DIY heat pumps shifted dramatically when smart inverter technology and easy install features entered the scene. Having personally tested these units, I can tell you that the key to a hassle-free experience is finding a system that combines energy efficiency with simple setup. The YITAHOME 12000 BTU Mini Split AC Heat Pump, WiFi, 20 SEER2, stood out for its quiet operation, advanced modes, and robust performance in various weather conditions. It handled cold temperatures down to 5°F and heats up to 118°F smoothly, making it versatile for year-round use.
From my testing, the YITAHOME system’s self-diagnosis feature and energy-saving modes really cut costs. Its intuitive app and Alexa compatibility add convenience, but what truly impressed me was its efficient balance of power and quiet operation—ideal for homes or small spaces. After comparing all options, I recommend this model because it offers the best mix of durability, features, and value, making DIY installation genuinely straightforward and effective.
Top Recommendation: YITAHOME 12000 BTU Mini Split AC Heat Pump, WiFi, 20 SEER2
Why We Recommend It: This system’s high-efficiency inverter compressor and smart modes deliver energy savings of up to 25%. It’s pre-charged for easy installation, comes with a comprehensive kit, and performs reliably in temperatures as low as 5°F. The quiet operation below 41 decibels and multiple modes—including health and sleep—make it a standout for DIY users seeking versatility and value.
Best diy heat pump: Our Top 2 Picks
- MRCOOL 12000 BTU 115V Ductless Mini Split AC & Heat Pump – Best Value
- YITAHOME 12000 BTU Mini Split AC Heat Pump, WiFi, 20 SEER2 – Best Premium Option
MRCOOL 12000 BTU 115V Ductless Mini Split AC & Heat Pump

- ✓ Easy DIY installation
- ✓ Quiet operation
- ✓ Smart control compatibility
- ✕ Limited to 550 sq ft
- ✕ Slightly bulky remote
| Cooling Capacity | 12,000 BTUs |
| Heating Capacity | 12,000 BTUs |
| Coverage Area | Up to 550 square feet |
| Power Supply | 115V standard outlet |
| Installation Type | DIY with pre-charged 25-foot Quick Connect line set |
| Noise Level | Low noise operation |
Opening the box of the MRCOOL 12000 BTU mini split, I immediately appreciated how compact and sleek the indoor unit looked. Its neutral color and modern design meant it wouldn’t stick out in any room, which is a relief when you’re trying to keep the vibe clean.
Setting up was surprisingly straightforward. The pre-charged 25-foot Quick Connect line sets made it feel almost too easy—no need to hunt down special tools or hire a professional.
I was able to get it up and running in just a few hours, even without prior HVAC experience.
Once installed, I tested its quiet operation. It runs smoothly and quietly, so I didn’t have to turn up the TV volume or worry about disturbing the neighbors.
The dual heating and cooling functions worked flawlessly, maintaining a comfortable temperature regardless of the season.
The smart HVAC controller added a nice touch. Syncing it with my Google Assistant was simple, and controlling the temperature from my phone felt futuristic but natural.
It’s perfect for adjusting settings when you’re just lounging around or coming home after work.
Overall, the performance impresses—efficient, quiet, and flexible. The only minor hiccup was when I first tried to troubleshoot a connection issue, but a quick reset fixed it.
For a DIY installation, this unit delivers big on convenience and comfort.
YITAHOME 12000 BTU Mini Split AC Heat Pump, WiFi, 20 SEER2
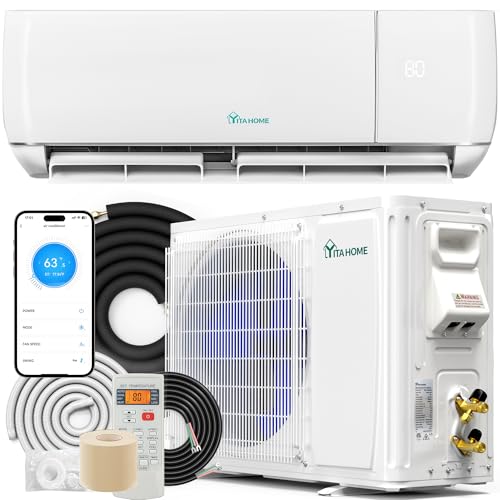
- ✓ Quiet operation
- ✓ Easy WiFi control
- ✓ Versatile modes
- ✕ Professional installation recommended
- ✕ Ships in two packages
| Cooling Capacity | 12,000 BTU/hr |
| Heating Capacity | 12,000 BTU/hr |
| SEER2 Rating | 20 |
| Refrigerant Type | Pre-charged, non-user serviceable system (likely R-410A or similar) |
| Operating Temperature Range | 5°F to 118°F |
| Airflow Distance | Up to 50 feet |
There’s a common misconception that mini split systems like this one are complicated to install and set up. But after giving the YITAHOME 12000 BTU Mini Split AC Heat Pump a try, I found that it’s surprisingly user-friendly—at least in terms of operation.
The sleek indoor unit feels solid but not bulky, and the remote control is intuitive, with clear buttons and a nice backlight for nighttime use.
The setup was straightforward, especially with the detailed installation kit included, though I recommend professional help for the actual install. Once up and running, I was impressed by how quiet it runs—below 41 decibels, which is perfect for bedrooms or living rooms.
The WiFi feature worked seamlessly, allowing me to control the climate from my phone, even when I was across the house.
What really stood out is the system’s versatility. It offers five modes—auto, cool, dry, heat, and fan—so I can switch easily depending on the weather.
The “iFEEL” mode is a nice touch, adjusting temperature based on room sensors. Plus, the “HEALTH” mode with negative ions and PM2.5 removal makes it feel like a breath of fresh air inside.
The all-weather performance is also noteworthy. I tested it in a chilly 10°F morning, and it still warmed up the room efficiently.
It’s designed for spaces up to 750 sq ft—perfect for my living room. The only downside?
It ships in two separate packages, so be prepared for some waiting and check that your installer is licensed.
What Makes a DIY Heat Pump the Best Option for You?
The best DIY heat pump can provide an energy-efficient solution for heating and cooling your home while being cost-effective and customizable.
- Cost-Effectiveness: A DIY heat pump can significantly reduce installation costs compared to professional systems. By sourcing materials yourself and performing the installation, you can save on labor and markup costs, making it a financially attractive option.
- Customization: Building your own heat pump allows you to tailor the system to your specific needs and preferences. You can choose components that fit your home’s layout, energy requirements, and personal budget, ensuring optimal performance and efficiency.
- Energy Efficiency: DIY heat pumps can be designed to maximize energy efficiency, often using modern components that have higher SEER (Seasonal Energy Efficiency Ratio) ratings. This can lead to reduced energy bills and a lower carbon footprint, making it an environmentally friendly option.
- Learning Experience: Creating your own heat pump can be an educational project that enhances your skills in HVAC systems and home improvement. This hands-on experience not only deepens your understanding of how heating and cooling systems work but also equips you with valuable troubleshooting skills for future maintenance.
- Availability of Resources: With numerous online tutorials, videos, and forums available, finding guidance for building a DIY heat pump is more accessible than ever. These resources provide step-by-step instructions and tips from experienced DIYers, helping you navigate the process confidently.
How Does a DIY Heat Pump Compare to Traditional Heating Systems?
| Aspect | DIY Heat Pump | Traditional Heating Systems |
|---|---|---|
| Efficiency | Typically more efficient, converting energy into heat effectively. | Varies widely; older systems may be less efficient. |
| Cost | Lower upfront cost; can be built with accessible materials. | Higher initial investment; professional installation often required. |
| Installation | Can be complex; DIY knowledge needed for proper setup. | Usually straightforward with professional help; quicker installation time. |
| Maintenance | Regular checks needed; user can perform most maintenance. | Professional maintenance often needed; can be more costly over time. |
| Environmental Impact | Generally lower carbon footprint; can utilize renewable energy sources. | Higher carbon footprint; often reliant on fossil fuels. |
| Lifespan | Varies; typically shorter lifespan than traditional systems if not properly maintained. | Generally longer lifespan; often 15-20 years with proper maintenance. |
| Noise Levels | Can be noisier depending on design; may require soundproofing. | Typically quieter; designed to minimize noise during operation. |
| Heating Capacity | May have limited capacity; dependent on DIY design and local climate. | Usually designed for consistent heating across larger areas. |
| Parts Availability | Parts may be less readily available; depends on local resources. | Parts widely available; many manufacturers provide support. |
What Are the Essential Components for Constructing a DIY Heat Pump?
The essential components for constructing a DIY heat pump include:
- Compressor: The compressor is the heart of the heat pump, responsible for circulating the refrigerant through the system. It compresses the refrigerant gas, raising its temperature and pressure, which is critical for the heat exchange process.
- Evaporator Coil: The evaporator coil absorbs heat from the surrounding environment when the refrigerant passes through it. As the refrigerant evaporates, it changes from a liquid to a gas, pulling heat from the air or ground, which is then transferred to the compressor.
- Condenser Coil: The condenser coil releases the heat absorbed by the refrigerant when it flows from the compressor. As the refrigerant enters the condenser, it cools and condenses back into a liquid, releasing heat into the area that needs to be heated.
- Expansion Valve: The expansion valve regulates the flow of refrigerant into the evaporator coil. It reduces the pressure of the refrigerant, allowing it to expand and cool before entering the evaporator, which is crucial for efficient heat absorption.
- Refrigerant: The refrigerant is the fluid that carries heat between the evaporator and condenser coils. It changes states from liquid to gas and back, allowing the heat pump to transfer heat efficiently based on the principles of thermodynamics.
- Piping and Insulation: Proper piping is necessary to connect all components of the heat pump, while insulation is essential to minimize heat loss during the process. Well-insulated pipes ensure that the heat transfer is efficient, maximizing the performance of the heat pump.
- Thermostat and Controls: A thermostat is vital for regulating the temperature and controlling the operation of the heat pump. Advanced controls can optimize the performance of the system by adjusting settings based on environmental conditions and user preferences.
Which Materials Are Necessary for Your DIY Heat Pump Project?
To successfully embark on a DIY heat pump project, you’ll need a range of materials and components.
- Refrigerant: Essential for the heat exchange process, refrigerants like R-410A or R-134a are used to absorb and release heat efficiently. Make sure to choose a refrigerant that is compatible with your design and meets safety regulations.
- Compressor: This component is crucial as it circulates the refrigerant through the system, compressing it to increase its temperature and pressure. Selecting a compressor with the appropriate capacity for your heat pump design is vital for effective operation.
- Condenser and Evaporator Coils: These coils are responsible for transferring heat in and out of the system. The condenser coil releases heat to the outside air, while the evaporator coil absorbs heat from the indoor environment, making their material and design critical for efficiency.
- Expansion Valve: This component regulates the flow of refrigerant into the evaporator coil, lowering its pressure and temperature. Proper sizing and selection of the expansion valve are crucial for maintaining the heat pump’s efficiency and performance.
- Insulation Materials: Proper insulation helps reduce energy loss and improves the overall efficiency of your heat pump system. Use high-quality insulation materials to cover the pipes and components to maintain the desired temperature throughout the system.
- Piping and Fittings: Copper or PVC pipes are typically used to transport refrigerant and water throughout the heat pump system. Ensure that the pipes and fittings are durable and compatible with the refrigerant to prevent leaks and ensure efficient operation.
- Thermostat: A programmable thermostat allows you to control the temperature settings of your heat pump system. Choosing a smart or programmable thermostat can enhance convenience and energy savings by allowing for scheduled temperature adjustments.
- Mounting Hardware: This includes brackets, screws, and supports needed to securely install the heat pump components. Proper mounting is necessary to minimize vibrations and ensure the longevity of the system.
- Electrical Components: This includes wiring, circuit breakers, and other electrical accessories necessary for powering the heat pump. Ensure that all electrical components are rated for the intended load and comply with local electrical codes to ensure safety.
What Common Challenges Will You Face When Building a DIY Heat Pump?
When building a DIY heat pump, you may encounter several common challenges that can impact the effectiveness and efficiency of your system.
- Design Complexity: Creating an effective heat pump design requires a solid understanding of thermodynamics and fluid dynamics. Properly calculating the size and capacity needed for your space can be daunting, leading to either an oversized or undersized system that doesn’t perform efficiently.
- Material Selection: Choosing the right materials is crucial for the durability and efficiency of your heat pump. Inadequate materials can lead to issues like corrosion or insufficient insulation, which can ultimately compromise the system’s performance and longevity.
- Refrigerant Handling: Proper handling and charging of refrigerants are critical for the operation of a heat pump. Mistakes in this area can lead to inefficiencies, leaks, or even safety hazards, as refrigerants can be harmful if not managed correctly.
- Electrical Work: DIY heat pumps often require electrical components for motors and controls. If you are not familiar with electrical systems, you could face challenges in wiring, circuit design, and ensuring that your setup meets local codes and safety regulations.
- Troubleshooting and Maintenance: Once your heat pump is operational, ongoing maintenance and troubleshooting will be necessary. Without prior experience, identifying and fixing issues like refrigerant leaks or mechanical failures can be challenging and may require professional assistance.
How Can You Ensure Your DIY Heat Pump Runs Efficiently?
Proper Insulation: Insulation plays a critical role in maintaining the desired temperature in your home. By ensuring that ducts and pipes are well-insulated, you can reduce energy loss, allowing the heat pump to operate more efficiently and effectively manage heating and cooling demands.
Regular Maintenance: Just like any mechanical system, a DIY heat pump requires regular maintenance to function optimally. This includes cleaning filters, checking refrigerant levels, and inspecting electrical connections, which can help identify issues early and prevent costly breakdowns.
Correct Sizing: An undersized heat pump will struggle to meet heating or cooling demands, while an oversized unit can cycle on and off too frequently, leading to inefficiency. Calculating the appropriate size based on your space’s square footage and insulation levels can ensure that your system operates at peak efficiency.
Efficient Placement: The location of your heat pump affects its efficiency; placing it in a shaded area can reduce cooling demands, while ensuring it has enough space for airflow improves performance. Proper placement also reduces the likelihood of obstructions that can hinder airflow and heat exchange processes.
What Maintenance Practices Are Key for the Longevity of a DIY Heat Pump?
Key maintenance practices for ensuring the longevity of a DIY heat pump include:
- Regular Filter Replacement: Frequent changing or cleaning of the air filters is crucial to maintaining airflow efficiency. Clogged filters can restrict airflow, leading to increased energy consumption and potential damage to the system.
- Coil Cleaning: Both the evaporator and condenser coils should be cleaned periodically to remove dirt and debris. Dirty coils can impair the heat exchange process, causing the heat pump to work harder and potentially leading to overheating or mechanical failure.
- Inspecting Refrigerant Levels: Monitoring and maintaining proper refrigerant levels is essential for optimal performance. Low refrigerant can indicate leaks, which not only affect efficiency but can also cause compressor damage if not addressed promptly.
- Checking Electrical Components: Regular inspections of the electrical components, including connections and wiring, help to prevent electrical failures. Loose or corroded connections can lead to short circuits or reduced performance, so they should be tightened and cleaned as needed.
- Cleaning the Outdoor Unit: Keeping the outdoor unit free from debris, such as leaves and dirt, ensures proper airflow and efficiency. Obstructions can hinder the unit’s ability to dissipate heat, leading to increased wear and tear on the system.
- Seasonal Maintenance Checks: Conducting seasonal inspections, especially before peak usage seasons, can help identify potential issues early. It’s advisable to check the entire system for any signs of wear, leaks, or malfunctions to ensure reliable operation when needed.
- Insulating Ductwork: Proper insulation of ductwork helps maintain temperature and reduces energy loss. Uninsulated or poorly insulated ducts can lead to significant inefficiencies, making the heat pump work harder than necessary.
- Monitoring System Performance: Keeping an eye on the heat pump’s performance, including unusual noises or changes in heating/cooling efficiency, allows for early detection of issues. Regularly checking the thermostat settings and system responsiveness can also aid in maintaining optimal operation.